How about something remarkable. Something never before experienced by most drivers. Something that makes waves. How about the butterfly effect?
Butterfly doors, also known as vertical doors or lambo doors, originated to solve a problem. The Lamborghini had a very wide base, and a traditional door design would not allow for easy entering and exiting, especially if parked next to anything. They devised a door hinge system that lifts the doors vertically, and only slightly out war, clearing the door of the opening, and also allowing the wide body car to still fit in traditional spaces.
These doors catch a lot of attention. When door open vertically, you get the "butterfly" effect, making waves wherever you are. People stop and notice these types of modifications because they are rare, unique, and very appealing. These kits are now available for most cars, and come as a universal kit that can be fitted to almost any vehicle. Some of the kits will require a little body work, but others are a direct bolt in. The hinges, gas shocks, and hardware may not look like $750 to $1000 worth of materials, but the finished results is well worth the money for most car enthusiasts and tuners.
We suggest professional installation for these types of kits, mainly because in a lot of cases, the inner fender wells need to be rolled or modified to fit the new brackets and hinges. Most of the kits are adjustable enough to create a unique vertical opening while keeping it fairly easy to get in and out of the vehicle. Look for kits that allow for both vertical and horizontal adjustments to be made for the best possible combination of style and comfort.
Butterfly doors are becoming the craze at most tuner events and shows. Some cars look better than other with the mods done to them, and you can probably find images of your car model with them installed somewhere on the internet. I would suggest seeing a finished product before investing the money. The kits are in most cases completely reversible if you are unsatisfied for any reason, or intend to sell the car at a future date.
If you want to turn you ride into a real showstopper, these kits are the way to go. They come in manual and automatic varieties. Vertical doors are a great addition to any show car. Vertical Doors, Inc. is credited with the patent on the design we are most familiar with. There have been several company create similar products marketed under the product "type" called vertical doors. They are also referred to as butterfly doors, or 90 degree doors. Either way, they give our daily drivers a nice exotic sports car look.
There are some varieties of doors out there that will fit the bill if you are looking for that extra something to add to your show car. There are the traditional "vertical" doors which open vertically. See picture below. These kits use specially made brackets and gas shocks to open the doors outward slightly, then upwards. They can be adjusted to open further our before going up to make it easier to get in and out of, as a common disadvantage to the door kits is the increased difficulty of getting in and out of the vehicle.
There are other types of door modifications that can be done, such as "suicide" doors that open exactly the opposite of traditional doors. The hinges are moved to the other side of the door opening so it swings the other way. Also a cool upgrade.
Still my personal favorite is the Dalorian style door as seen in back to the future. These doors are hinged in the center of the roof, and raise straight up allowing for easy access in and out of the vehicle. This type of modification would call for some extensive mods to the roof system, as well as some fabricated doors, but it would make for a serious upgrade!
If you are interested in trying to install your own vertical door conversion kits, be warned, it can be tricky, but here is a guide to help you in the process.
1. Lift the hood and remove left and right shield of front wheel.
2. With the door open pull out the rubber hose connecting the door and the door frame, draw out and cut the wire (wrap the two ends of every cut wires with friction tape and record the given numbers. If the wires are long enough, it ‘s not necessary to cut.) and then remove the rubber hose of the wires.
3. With door closed remove the factory top door hinge.
4. Test and draw the placement of the mechanism. Pay attention to the moving way of the swing arm and ensure the swing arm up to 90° not to touch the shield or fender. So the mechanism must be in a proper height, which can be tested by the shield.
5. Grind the installation placement of the chassis or hammer any extrusions that may hinder the base plates from sitting flat. You may also grind and cut the base plate and door plate as needed.
B. After grinding the installation placement, test the proper distance with the shield and check and observe any places that may prevent the base plate and the swing arm from moving. In this situation you must draw a line around the base plate when it is in the proper, and then cut or hammer along the perimeter till not to hinder.
C. In cars with small spaces between the chassis surface and the fender there will not be sufficient room to install. It can be solved as follows: with the position of the base plate determined, draw a line around the base plate when it is in the proper position, and then cut along the perimeter to allow the base plate to slide below the surface.
6. Determine the holding position and space. Draw the position of the safety arch on the base plate and cut it. Cut a slot in the chassis to accommodate the arch, and if the base plate is below the chassis surface for your application make additional space for adjustment with a hex key.
7. Next you should cover the base plate, door, and the rest parts of the door mechanism in welding deflection paper with the exception of the surface of the surface that will get welded for the surface protection.
8. When the door mechanism clings to the chassis, door place, and moves smoothly and is proper in both horizontal and vertical direction after testing again, weld spots around the perimeter of the base plate and the door plate. When you feel the welds are sturdy enough, remove the down door hinge. You may observe and test whether the door is in the correct motion and position by swinging it out and up manually. Now you can make adjustments at the door outward motion screws, safety set screw and door height screws etc. on the door mechanism.
9. Determine and draw on the shield or fender the position space of the swing arm’s motion and cut it. Test it again and cut the inner lip to provide clearance for the swing arm.
10. Once you are satisfied with the operation and placement like opening, closing, lifting and falling of the door and door mechanism, hammer the hinge center axis of the mechanism from top to bottom and then remove the door. Make a strong weld around the entire perimeter of the base plate and door plate. (Parts must be prevented from broiling of the high temperature while welding.)
11. Grind and scuff the welds surface and mask the undercoat paint and top coating to prevent rust.
12. Lube the moving surfaces of the door mechanism with heavy waterproof grease and then close the door, align the hinge holes and interpose the center axis to the holes form top to bottom and then hammer it well and smoothly.
13. When the door is open up to the maximum angle, clear up the wires. Measure the wires and connect to the required length with other wires if it is not long enough. Remember to connect with the numbers while cutting and to mask the joints with the insulation tapes. With the wires plaited into cluster, fixed at the bottom of the swing arm with plastic and string.
14. Open the door and rotate it to the highest point, screw two ball joints into the swing arm and gas spring connecting plot respectively with gas spring screws and then determine and mark the spot where the ball joint will get mounted on the chassis.
15. Put the door down for now and disconnect the gas spring ball screw form the gas spring connecting plot and then hammer or grind the fixed position of the connecting plot and weld it well on the fixed place. Paint for dust prevention.
16. Open the door to the highest point and screw the gas spring ball points into the connecting plot and lock the ball points on the swing arm tightly at the same time. And test the doors motion. The swing arm should be parallel and not interferes with the gas spring or other parts when the door moves up and down.
17. With the door closed, test the door’s horizontal motion until the door is aligned with the latch and closes perfectly. Adjust the safety arch until the door mechanism no longer interferes with the shield or fender when the door out all the way horizontally. Then set the horizontal motion screws to correspond with the angle that the safety arch rubs the inside of the lifting arm when up. The closer you make these two adjustments, the more sturdy the door will feel going up and resting in the vertical position. Set the vertical height limiter adjustment as high as you wish provided that the door does not hit the shield or other parts.
18. If the door panel and/or door metal hits the shield or comes too close to the shield on the way up it must be cut. If the door panel must be cut first mark a line that will allow clearance. Then peel back the upholstery, make the cut and wrap the upholstery over the new edge with spray adhesive.
19. Test it again until no any hinder and satisfied with everything; seal the screw adhesive to all the screw points.
20. Mount the shield, fender etc. and put down the hood. This will complete the installation.
Good luck and stay TUNED!
Tuesday, January 22, 2008
Wednesday, September 12, 2007
Total control and comfort behind the wheel
If you are into performance like we are, then you know what real performance feels like. You've added the cold air intakes, the exhaust, and the headers, and now your engine is coming to life. Now you need to feel like to are in control of this new found power. Its time to upgrade your cockpit. Start by looking into some race inspired sport seats! These seats are low profile, ergonimic, and really provide the support you need when driving a performance machine! Pair the seats up with some racing pedals and a sports steering wheel for the ultimate driving experience. Check out the full line of Racing Seats and Majestic Modifications.
Monday, January 29, 2007
Installing Racing Seats and Sport Seats
Racing seats are a great interior upgrade. We have developed this guide to aid in the installation process for your new seats. The process is fairly easy if you are mechanically inclined, so let's get started!

Begin by removing your existing seats. Start with your driver side first and locate the four bolts that hold the seat in place. They will be located at the front and rear of each rail. Be sure to return the chair to an upright position so the weight is evenly distributed. This will keep the seat from falling over once all the bolts are removed. After removing the front two bolts, gently lean the whole chair onto it's back and undo any electrical connections. Remove the seat by rotating it out of the vehicle. The degree of difficulty in removing the seat from the vehicle may vary from car to car, but is usually easiest with the chair in the upright position, removing the seat starting from the base.
Assemble your seat brackets and sliders on the racing seats if they did not already come assembled. The brackets must be installed in the proper direction, so make sure they have the right orientation before bolting them to the seat. The aftermarket seat bracket may have holes for the seat belt receiver. If so, screw it in place. Attach the aftermarket bracket to your race seat before placing it into the car. Test fit and see if you like the height of the seat, and adjust accordingly if you can.
In many applications, the bolt holes may not line up, especially if you have purchased universal racing seats. You will need to drill new holes for the bolts. You can accomplish this by placing the seat in the car and positioning the seat where it feels comfortable. Take note of how far up or down the seat is sitting on the brackets, because you will want to make sure that once the seat is bolted in place, it can slide forwards and backwards as you need it to.
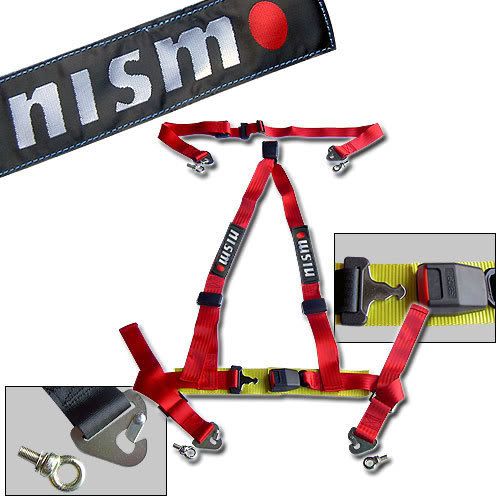
If you have a race harness (4 or 5 Point harness) now is the best time to attach the belts. Attach the front bolts in loosely, then try to put in the rears. Lightly tap in the bolts into the bracket holes if they don't line up exactly.
Tighten all of the bolts to the car, and double check each one for tightness. Sit back on the seat and make sure your sliders are functioning properly. If the seat does not slide freely, loosen the bolts enough to adjust the positioning. Readjust and tighten until you get it lined up correctly. Then strap yourself in and take off!
To purchase your racing seats, visit Majestic Modifications Online!
Begin by removing your existing seats. Start with your driver side first and locate the four bolts that hold the seat in place. They will be located at the front and rear of each rail. Be sure to return the chair to an upright position so the weight is evenly distributed. This will keep the seat from falling over once all the bolts are removed. After removing the front two bolts, gently lean the whole chair onto it's back and undo any electrical connections. Remove the seat by rotating it out of the vehicle. The degree of difficulty in removing the seat from the vehicle may vary from car to car, but is usually easiest with the chair in the upright position, removing the seat starting from the base.
Assemble your seat brackets and sliders on the racing seats if they did not already come assembled. The brackets must be installed in the proper direction, so make sure they have the right orientation before bolting them to the seat. The aftermarket seat bracket may have holes for the seat belt receiver. If so, screw it in place. Attach the aftermarket bracket to your race seat before placing it into the car. Test fit and see if you like the height of the seat, and adjust accordingly if you can.
In many applications, the bolt holes may not line up, especially if you have purchased universal racing seats. You will need to drill new holes for the bolts. You can accomplish this by placing the seat in the car and positioning the seat where it feels comfortable. Take note of how far up or down the seat is sitting on the brackets, because you will want to make sure that once the seat is bolted in place, it can slide forwards and backwards as you need it to.
If you have a race harness (4 or 5 Point harness) now is the best time to attach the belts. Attach the front bolts in loosely, then try to put in the rears. Lightly tap in the bolts into the bracket holes if they don't line up exactly.
Tighten all of the bolts to the car, and double check each one for tightness. Sit back on the seat and make sure your sliders are functioning properly. If the seat does not slide freely, loosen the bolts enough to adjust the positioning. Readjust and tighten until you get it lined up correctly. Then strap yourself in and take off!
To purchase your racing seats, visit Majestic Modifications Online!
Subscribe to:
Posts (Atom)

